An Angel in the Kitchen is a real food and family recipe blog.
A place to be able to find our recipes again & remember how we made stuff!

Friday, May 20, 2022

Passionfruit or Feijoa Chia Pudding

Last week I kept looking at the lovely wrinkly passionfruit sitting on the bench wondering what I could use them for before they go off and I waste them, when I suddenly thought of chia pudding (don't know why they have to call it "pudding" but there you go). It is so easy to make and incredibly delicious. 

So I put a 1/3 cup of chia seeds (any colour) in to a small agee jar (500mls) then added 

1/2 tin of Kara coconut cream

1/2 cup of thick natural yoghurt

5/6 passionfruit scooped out

And a large tbsp of honey

Mix thoroughly and leave to sit until the chia seeds swell and the whole thing goes gloopy.

Add more yoghurt or coconut cream if it's too thick.

Probably best left overnight in the fridge. It's brilliant poured in to small jars so then it can be taken to work, school or just to serve one person. 

Serve the pudding with fresh fruit or eat it from the jar.


Feijoa chia pudding is so amazing and very feijoary!
If you're making this you're probably at the stage in the feijoa season where you're wondering what else you can do with all the fruit, so scoop out a whole lot into a pot and cook on a low heat, adding nothing else at all, until the feijoas have made their own juice and then cook a little more until they've thickened up a bit. While they're still warm add a large tbsp of honey and stir it in.
I love to add a dash of rose water too.
To make the pudding choose a jar or bowl that works for you and add 1/3 cup of chia seeds
Then 1/3 cup of coconut cream (Kara is great) and 1/3 cup of natural yoghurt.
Stir altogether very well.
Now stir in the cooked feijoas- as many as fills the jar or whatever seems good to you.
Mix again.
Pop in t the fridge to soak for an hour or overnight.
Check the thickness and add more coconut cream, cream, milk or yoghurt if it seems too stodgy.
Once you've got the hang of this I am sure you could experiment with all kinds of different fruits.
You can also make it with whatever you like- nut or oat milk, coconut yoghurt etc.
That's it! 
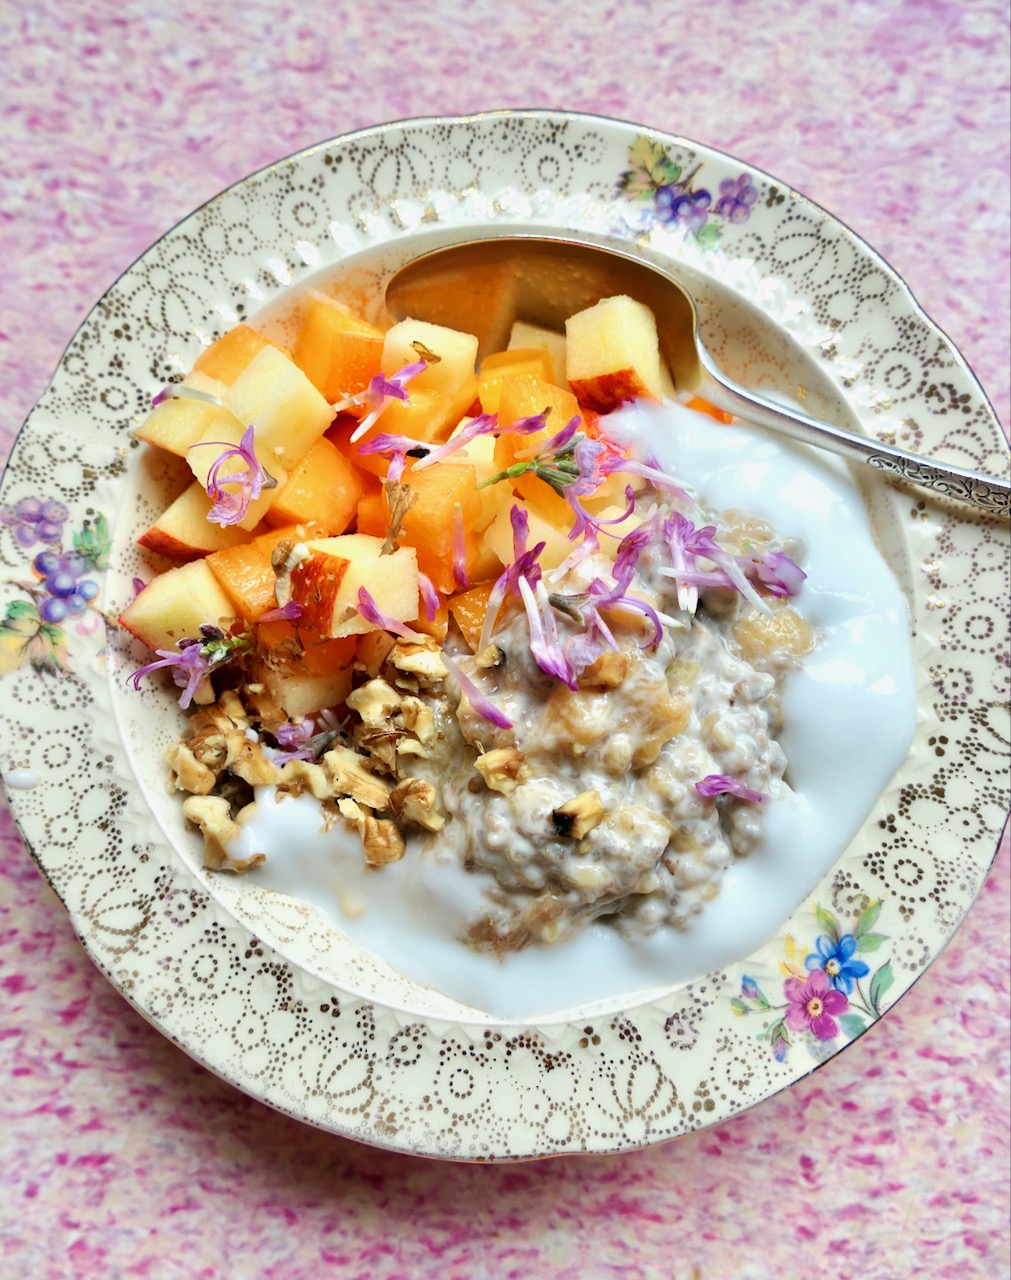
Feijoa chia pudding with apple, sweet persimmon and red clover flowers and a glass of nettle infusion.


Katie X

Feijoa Jelly

 A few weeks ago when a man gleefully bought himself a large bag of feijoas from our wee stall he paused to chat and told me about how he likes to make a delicate jelly with the fruit. He uses a whole can of condensed milk to the blended fresh feijoas and them sets the liquid with gelatine. I just can't quite bring myself to use a tin of condensed milk so instead I used 1/2 can of Kara coconut cream, some honey and a little rose water. I soaked some gelatine in a little of the liquid, heated it gently to dissolve and then stirred some feijoa/coconut cream mix in to the warm gelatine stirring all the time- mix it all in together and then pour in to jars, small bowls or a larger one and leave to set in the fridge. It's quite gritty- feijoas will do that, but it's delicious. Adjust the amounts to suit. and gosh, use condensed milk if you want to!


Katie X

Sunday, April 17, 2022

Walnut Caramel Tart and Baked Pears

Ooh this tart is amazing & just perfect to bake in April when you've gathered up a whole pile of walnuts & started drying & cracking them. I found the recipe originally @ thisNZlife, made the tart, loved it & then promptly lost the recipe again. Absolutely no other walnut tart recipe will give you a sublime result like this- truly. Thank goodness the recipe surfaced again a year later.           
Walnuts, ground almonds, honey & eggs make this tart sublimely delicious, light, nourishing & not too rich.


Before you begin making the pie- roast/toast 1 1/2 cups walnut pieces in the oven that you've turned on to bake 180 degrees C & when done set aside.
The pastry: 1 1/4 cups of flour 
2 tbsp of icing sugar, brown sugar or a fine jaggery
125 grams chilled butter cubed
2 tablespoons cold/chilled water
Either pulse altogether in a food processor, or rub the butter in to the flour & sugar & then mix in the water to form a firm dough.
Press in to a 23 cm greased/baking paper lined pie tin or several smaller ones.
Bake for 10 minutes in a moderate oven.

Filling- put in to a pot: 
75 grams butter
1/2 cup of lovely honey 
1 large tbsp of jaggery or brown sugar 
Gently heat together to dissolve the sugar & melt the butter. Cool.
Add 4 beaten eggs
3/4 ground almonds & mix altogether
Add 1 cup of toasted walnut pieces & mix in
Pour the filling in to the pastry. Now arrange another 1/2 cup of walnut halves or bits in to the filling.
Bake at 180 degrees C for 10 minutes & then for another 20-25 minutes at 160 until the pie is golden & firm to the touch. Cool before removing.
 

Oh Lordy- this was the time we made the tart 'cos Nina & Luca were coming & we ate it with green cheese!

A perfect accompaniment to the walnut tart- baked pears & soft cheese.
To bake the pears- halve, scoop out the core with a teaspoon, slice a little off the bottom so that the pears sit flat. Then scatter toasted walnuts over each half, drizzle with maple syrup & bake for 20 minutes until tender. Firm pears like Beurre Bosc are great for this recipe. Figs work brilliantly too.

The pears make a wonderful autumn breakfast food. Here they are served with thick natural yoghurt with loads of cinnamon mixed through it, a pretty begonia (edible), a baked fig & an elderberry, blackberry & hibiscus immune boosting pastille. You can find the pastille recipe just here.

Katie X

Saturday, March 5, 2022

Hawthorn and Blackberry Ice Blocks, Jelly and Pastilles

Late summer in Hawke's Bay means that it's time for both blackberry picking 

& the gathering of hawthorn berries. 
Both are deeply rewarding but also rather challenging to harvest with all those thorns & prickles, providing a great opportunity to slow down & enjoy the experience.

So it's lovely to realise that there are so many delicious things to do with them both. Last summer I came across a brilliant little recipe for "ice pops" over at Learning Herbs. I have adapted the recipe to make use of blackberries, rather than raspberries. It is so worth reading the whole article about reducing inflammation & managing the heat of summer.

To make the basic mix: simmer 1/2 c haws & 1/2 c (or a little less) hibiscus sabdriffa in 2 cups of water in a medium sized pot for around 10 minutes, add 1 cup of blackberries & simmer for another 10 mins. Strain. While still warm add 1/2 c honey & a pinch of salt & stir to dissolve the honey.

When cool stir in 1/2 tin of coconut milk or cream. We prefer Kara coconut cream.

Stir altogether & pour in to ice block moulds. Freeze.


Any extra can be set in to a jelly with gelatine.
Or the same mix can be used to make a larger dessert like below.

Simply take a 1/3 c of the liquid before you've added the coconut cream/milk & add 1 1/2 dessertspoons of gelatine. Stir. Leave to swell for a few minutes. Microwave for 12 seconds & stir to dissolve. Pour the gelatine mix in to the main liquid & stir well. Now mix in the coconut cream.

Pour in to a pretty bowl, small bowls or little jars with lids. Pop in to the fridge. 

Each time we make this fabulously simple dessert it comes out a different colour. It naturally layers itself much like Spanish cream which is fun.
The final option is to make a batch of immune boosting, gut nourishing pastilles: use the same original recipe but leave out the coconut cream & add fresh or dried elderberries.
The amount is a little less so in to a medium pot add 1 1/2 cups water & 1- 1 &1/2 cups of a mix of hawthorn berries, blackberries, elderberries & hibiscus sabdariffa. Simmer gently for 20 minutes. Strain. Add honey to taste.
 Take out a little of the 1 1/2 cups of liquid & add 3 tablespoons of gelatine. We really like Nutra Organics natural gelatine. Pop in to the microwave for 15 seconds (or use a small pot on the stove). Stir to dissolve. Pour the gelatine into the main liquid stirring well. Pour in to moulds or a small tin lined with baking paper. A syringe is a great tool to get the liquid in to small moulds. Leave to set- around 20 minutes. Press out shapes or use a biscuit cutter to make hearts etc, if you'd like to. 
Will keep in the fridge for a couple of weeks. Best left uncovered to deter moulding. One or two eaten each day from late summer into autumn make a delicious seasonal support for old & young a like. 


Both pictures by Margaret Tarrant
Katie X

Sunday, December 26, 2021

Pohutukawa Flower Syrup and Spice

This December we set out to spend time with the magnificence of the Pohutukawa trees in flower throughout Hawke's Bay. Along the way we discovered that the stamens of the blooms can be used to make a delightful cordial. There is very little reference to the flower being used by Maori, however, there are two contemporary foragers that have been sharing about their use of these special blossoms on social media so I went ahead to see just what all the fuss was about.  
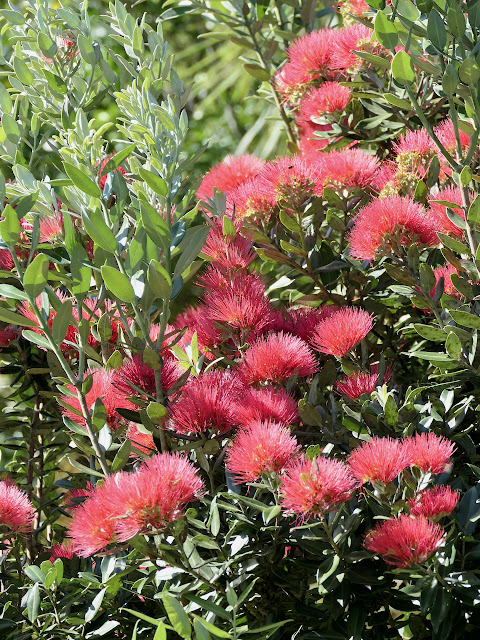
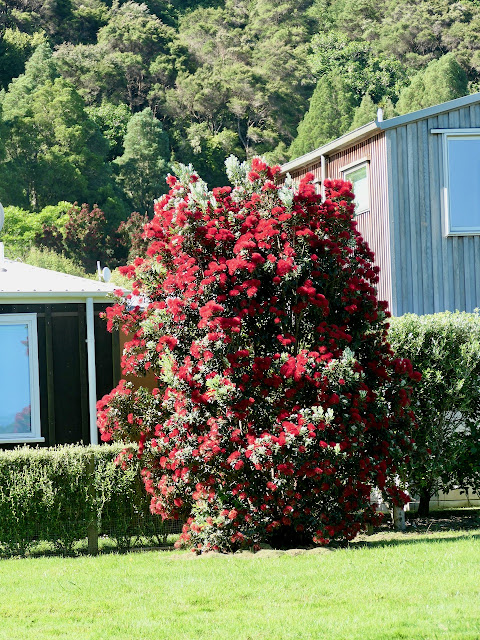
Once you start taking notice it is amazing just how many variations of the colour red Pohutukawas bloom in. We found these trees out at Waipatiki beach in the week before Christmas.
I adore that these tenacious native trees are known as the New Zealand Christmas tree.
There's a bit of an art to gathering the stamens as they don't just nicely fall in to your hand, unless they are ready to drop. Picking the whole flower head isn't much use as they are still quite difficult to remove even when dry. So, like many foraging practises the best idea is to slow down, be patient & grateful & take your time.

The stamens dry very quickly & have a lovely berry fruity fragrance.
Pohutukawa stamens with Kawakawa fruit
To make Pohutukawa cordial simply bring a cup of water & a cup of sugar to the boil & then stir to dissolve the sugar. Add 1 tsp citric acid & 1 1/2 cups of the stamens. Make sure that you've removed any of the hard green bits first. Cover & leave to infuse all day or overnight. Strain & bottle. 
This is the best post I have found so far about making this cordial over at Kailash Herbs.
You can reduce the sugar content of the cordial but it won't keep as well & the balance will be different. Same with the citric acid- it helps to acidify what would otherwise be a very sweet syrup. Lemon would swamp the delicate flavour of the Pohutukawa flowers.

Increase quantities according to what you have & how much cordial you'd like to make. The above amounts make just enough for a 500ml bottle. White cane sugar or raw sugar both work fine.

We think that the cordial tastes much like strawberry jam. It is lovely mixed in to fizzy water.

The dried stamens can also be ground in a spice grinder until very fine & then put through a fine sieve to produce a deep red delicious "spice". The desert below is a mixture of whipped cream, thick natural yogurt, honey & a large teaspoon of Pohutukawa spice. The strawberries are marinated in a little maple syrup and the green stuff is finely ground pistachio nuts.
The same mix can also be frozen to make a very nice semifreddo. Just remove from the freezer and allow to sit for 10 minutes before serving.
I learnt about making Pohutukawa spice from this post here at Finders Eaters Foraging.

The sauce in the above desert I made by simmering a few wild cherries for 20 minutes in a little water, (Prunus padus var padus) that we discovered out at Sacred Hill, & then adding a little honey.

Such a rich delicious flavour.

For Christmas I made a Spanish Cream using this recipe & adding a large teaspoon of Pohutukawa spice. I would leave out the vanilla next time as it overwhelmed the fruity flavour of the flowers. 
Charming served in pretty teacups.

Delicious served with roasted strawberries. When the strawberries are cooked but still have a little liquid left I mixed in a little honey & some Pohutukawa spice. The wafer was some Speculaas that Dutch friends gave us- perfect combination!


Katie x

Friday, August 20, 2021

Fruit and Vegetable Bran Muffins or Loaf

After having an inspired conversation with Viv at Cornucopia, our local organics shop, a while back- about how her grandkids were happily eating loaf stuffed full of veggies, I decided I would have a go at making bran muffins with loads of both fruit & veggies in them to see if they really were that yummy. Well it turns out that they really are both filling & delicious & can be made in to either muffins or a loaf. 

The mix is brilliantly free-form so just use whatever is to hand. So far I have incorporated, grated carrots, parsnip, courgette, choko, apple, pear & banana. Almost any kind of dried fruit would be useful too & nuts like walnuts if you have them. 


In a large bowl add:

1/2 cup bran

1/2 brown sugar (demarara, coconut or other)

100 grams of chopped butter

A pinch of salt. A tsp each of cinnamon & ginger to taste.

A tsp vanilla essence

2 cups of dried fruit- dates (definitely) raisins, sultanas,  dried apricots, prunes etc

Pour over a cup full of boiling water stir & leave to sit until just warm & well soaked together.

Add an egg & a large tbsp of plain yoghurt 

Add 1/2- 1 cup of nuts- walnuts etc

2 cups of grated fruits & vegetables such as apple, pear, carrot, parsnip, beetroot, choko or courgette.

Add a mashed ripe banana

Stir altogether & then sift in 1- 1/2 cups of wholemeal flour & 2 tsps baking powder. Just see how the mix is looking. You may not need all the flour.

Gently fold the flour through the mix.

Spoon in to large muffin tins or a greased/lined loaf tin.

Bake for 20-30 mins at 180 degrees C until firm & a nice colour.

I guarantee no one will ever guess there's all those veggies in there!


Katie x