An Angel in the Kitchen is a real food and family recipe blog.
A place to be able to find our recipes again & remember how we made stuff!

Saturday, December 28, 2019

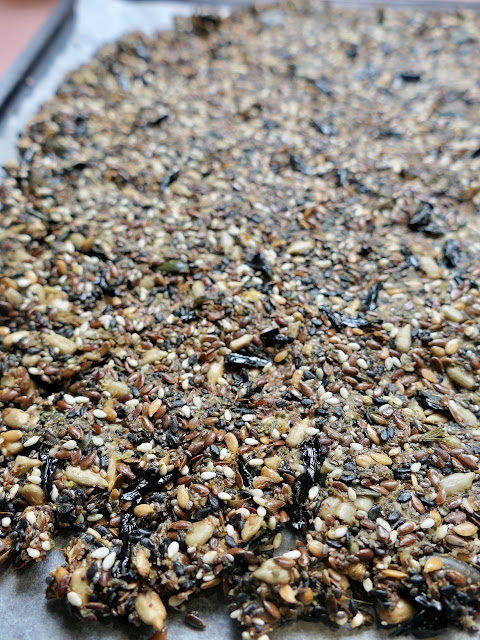
Seed Crackers

 These seedy crackers are so easy to make, stay crunchy for ages & are super munchy & satisfying.
They are a Ruth Pretty recipe, but in my usual manner (which is probably quite rude of me!) I have made some slight adjustments & an alternative version.
Firstly turn on the oven to 180 degrees C
Then put theses ingredients in to a bowl together:
1/2 c sunflower seeds,
1/4 c linseeds brown or golden
1/4 c sesame seeds white or black
2 tbsps chia seeds white or black
1 tsp sea salt & a good few grinds of black pepper.
Add 1 c of white rice flour, 1/2 c water & 1/3 c extra virgin olive oil
The last addition is either a tsp of garlic powder (which I didn't add) or my preference, a tsp of finely chopped rosemary & a tsp of black cumin seeds.
Mix altogether. I like to use my hands to knead it all so it holds together.
Then press it out on to a baking paper lined oven tray as thin as possible/reasonable.
You can either mark the dough into rectangles or just break it all up once cooked.
Bake for around 15- 20 minutes but keep an eye on things towards the end so that they don't over cook, but do go nice & golden.
Once cool, store in an airtight container.
 The second version is lighter & crisper & has no flour in the mix. So instead of adding the cup of white rice flour add 1/2 cup of psyllium husks (organic shop) & 1/2 cup of ground almonds.
Once mixed just let the dough sit for 10 minutes so that the psyllium can do it's work & soak up the liquid & hold everything together- then press out on to the baking paper lined tray.
 The original version is at the front of the photo.

The third rendition 8th January 2023
You can make them as simple or as interesting as you like. I added: white & black sesame seeds, sunflower seeds, pumpkin seeds, chia seeds, some dried onion weed, tiny Rosy garlic bulbs, coriander & black cumin from the garden, flax seeds, linseed, nettle seeds, yellow dock seeds, plantain seeds, sea salt & ground black pepper, water, olive oil, psyllium husks, buckwheat semolina & a little tapioca flour.
NZ flax seed- Harakeke, Phormium Tenax- ready at this time of the year.


Katie X

Elephant Milk!

Last Christmas, there was an unexpected stall at our Farmers' market run by some parents from Napier Central School. They were selling a book called Neighbourhood Eats. It was so beautifully presented & entirely made by the parents & PTA as a fundraiser. It's a gorgeous book, so we bought a copy. We love to support local endeavours. So.. this Christmas we decided to make the Elephant Milk, from the desserts section.

The recipe was provided by Cameron Huckle- a family favourite from Granny in Zimbabwe.
 Elephant milk has in fact been known to me for quite some time. Only, 40 years ago we called it Lemon Crunch Pie. You can find that recipe just here. One of the easiest dessert recipes ever & almost certainly universally loved. The only difference between Lemon Crunch Pie & Elephant milk is two egg whites & a tweek on the method- so just go with whatever works best for you.
Simply pour a can of sweetened condensed milk in to a bowl, add 300mls of cream, half a cup of lemon juice (preferably a Lisbon type- better flavour & setting effect) & the finely grated zest of the lemon. You can skip the zest if you prefer.
Beat altogether until thick, like whipped cream.
Beat the two egg whites to soft peaks & then fold those through the lemony mixture.
 Now pour in to bowls, tea cups or a large bowl  if you prefer & pop in to the fridge to set, or freeze for a couple of hours or overnight to make ice-cream, or pour over a biscuit base & there you have Lemon Crunch Pie- the easiest cheesecake you will ever make. The mixture can also be layered with crushed biscuits, nuts & custard.

 Since I made this at Christmas I have served this ice-cream with lychees, fresh shredded coconut (that I recently discovered in the freezer at the local Asian shop) White Soul strawberries, a ripe Kawa kawa fruit pulled off the stem & finally a drizzle of Linden honey.
 It tastes absolutely amazing together! But as Felicia was want to say- "If you like that sort of thing!"
 These Linden flowers are from a Silver Linden tree & we found them flowering on Christmas day. Their scent is like nothing else on earth- heady Linden plus deep jasmine notes- steeped in a light honey (I used Tawari) for a day or so & you have a truly magical elixir.

So...either keep it simple, or let your imagination run wild. I did!
Katie X

Sunday, September 22, 2019

Delicious Raw Ginger Slice

I came across a recipe months ago just here for a raw ginger slice. I finally got around to making it today- my way. I'm not in to "plant based" or vegan diets so I have reinvented the recipe for myself & it is so delicious!
My amounts are pretty approximate as I was making it up as I went along.
Make to taste & according to what you have a available & your own needs & preferences.
I really like this simple base that's blended altogether in a food processor:

1/2c walnuts, 1/2c raw cashew pieces & around 8 large soft, stoned dates.
Add a few pieces of glace or crystallised ginger.
Blitz in together until it's nice & fine & blended.
Add a tbsp of melted coconut oil & pulse to mix.
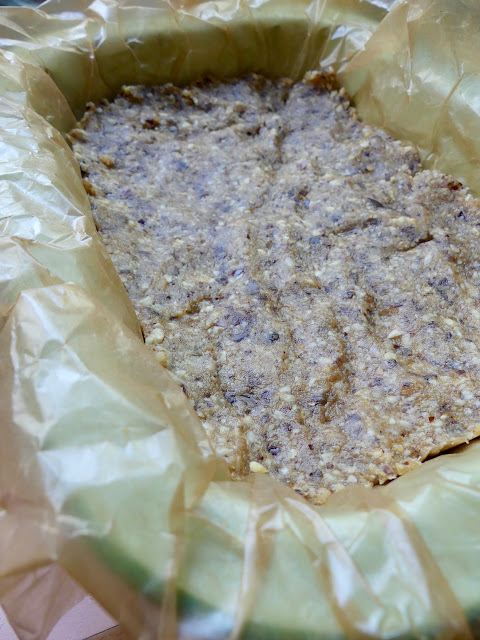
Press in to container- couldn't think what to use & then I found this pie dish.
I've used some natural waxed paper underneath.
Pop the base in to the fridge.

Topping:
1 cup of broken raw cashews soaked in unchlorinated water for 4 hours, or overnight. 
Drain- & put in to the food processor with
10- or so stoned dates, 1 large tbsp of honey, a squeeze of lemon juice, a tsp of true vanilla essence, 1/2 tsp of good salt, 3 good tsps ginger powder.
Blend until smooth.
Add 1/2 cup of coconut cream or milk & 1/2 cup of a mix of melted butter & coconut oil.
Blend some more.
Taste & adjust the balance to suit.
Pour over the base & pop in to the fridge until set.
Keeps well in the fridge.


Wednesday, August 21, 2019

Glorious Sweet Violet Jelly & Cheesecake

It may seem a bit odd- a whole lot of pictures of flowers in a food blog, but truly it is not. I've come to believe that the presence of violets in the landscape redeems winter beautifully, not to mention that they are the loveliest of medicines. I have posted here about making violet honey syrup- a resource we would now never be without. We have both been irritated by the abundant drenching of the whole province with pine pollen over the last month & heavily relied on the violet honey syrup to get us through the night. It is amazing for soothing a cough- instantly! 
There are several places that we know we can gather wild violets locally: Ellis Wallace road, Keirunga valley- under the oaks & at the top of the Karituwhenua walkway off Te Mata road in Havelock North 

 If you are picking for making violet syrup it's quicker to pull the flowers rather making a bunch of them.
 Every part of the gathering process is a joy- the heady fragrance,
 the visit to the land & the blessing that the plants offer as we gather them with so much respect & gratitude.
And of course, you may find other treasures along the way.
 Violets come in so many pretty hues- all are valuable.
 As long as you have a good proportion of purple the colour comes out much the same.

The syrup, once made, is best stored in small jars in the freezer, but since Rob still had a particularly niggly cough I thought that little jellies might be useful. Useful- they are amazing! 
 I simply set the syrup with a good amount of gelatine. Left uncovered in a little dish in the fridge it lasts for ages or until it disappears!
 After making the violet jelly I wondered what a little cheesecake might be like.
I decided to use a simple base of soft dates & nuts- a mix of flaked almonds, cashews & home shelled walnuts. Didn't take long to come together in my little food processor. I used quite a few dates so I didn't need to add any other sweetening. I added the juice of half a lemon & a tbsp of melted coconut oil & it set to a lovely texture.
 I used a 400ml jar of Raglan blackcurrant & vanilla coconut yoghurt as the middle layer, set with a large dsp of gelatine dissolved in a little juice or water. It's a good idea to mix in some yoghurt  to the gelatine before adding to the rest. Mine started to set too quickly in the cold yoghurt.
The violet honey syrup was also set with a lovely organic gelatine in the same way.
The flavours are just delicious together.
It's amazing how many edible winter flowers that there are- violets, grape hyacinths, forget-me-nots, jasmine & sweet alyssum look lovely with the violet cheesecake.

The other winter flower that is just delicious & works nicely with violets & lemon (or lime) to make an amazing natural fizzy drink is magnolia. You can find how to make Fee just here
Love Katie xx

Saturday, March 30, 2019

Smoky Haw Sauce

Hawthorn is one of our favourite wild foods and is also a beautiful medicine and tonic for the heart. The berries, also known as haws, are ripe & ready to harvest through late March & the month of April. Some say that they taste sweeter after a frost, but if I'd followed that advice in one spot last year, I would have lost the lot to the pukekos!
We gathered these haws (below) up the Esk valley in Hawke's Bay last week and they are just perfect. Thanks to Abby @ Earthly Pearls and her wonderful hawthorn post and recipe for smoky haw sauce we have been able to get the hang of making our own sauce and it's totally worth the effort.
Haws are not something that you can pick in a hurry and since the plants have long thorns, are frequently found on steep hillsides and the fruit is quite small, we find that we come home with a very manageable amount of fruit with each picking.
Firstly, we sit for a few minutes at a time gently pulling off the berries and discarding as many stalks as possible & any leaves.
We both love this therapeutic process.
Next, wash the berries well and drain in a colander.
Put in to a pot that matches the amount of berries that you have and just barely cover with a mix of half water and half good apple cider vinegar.
I like to leave them to soak in the vinegar for an hour or two, or even overnight.
Then, turn on the heat & gently bring them to the boil. Simmer for around half an hour until the colour has gone out of the fruit and they have become soft.
Pour the liquid in to a jug and push the cooked berries through a coarse sieve or colander.
Using a potato masher is quite handy for squishing everything up and then we take turns working the soft stuff through the sieve until all we have left is some fibre and the little stones from inside the fruit or we've had enough- which ever comes first. Adding some of the liquid every now again also helps to get the pulp through to the other side.
Carefully scrape the goodness from the back side of the sieve as best you can & then discard the seeds that remain.
Pop the sieved hawthorn back in to the pot with any left over liquid.
This is not a strict recipe- just a general take it as it comes arrangement so, say to 
~ 3 cups of pulp I then add around a cup of raw sugar (or you could use honey)
~ 1/2 tsp of good salt, some ground black pepper
~ 1 large tsp of smoked paprika 
~ 1/2 tsp of chipotle powder (don't worry if you don't have any but it really is amazing)
Simmer all these bits and pieces together for perhaps 15- 20 minutes until thick and smooth.
Check the seasonings and balance and add more salt, sugar or spice to taste.
Pour in to sterilised jars or bottles.
No idea if it keeps well as we ate it all before we could find out!
Here is another plain version with measurements:

  1. 500g of hawthorn berries.
  2. 300ml of cider vinegar.
  3. 300ml of water.
  4. 170g of sugar.
  5. 1/2 tsp salt.
  6. freshly ground black pepper.


Tuesday, March 19, 2019

Dreamy Fig Ice-cream

Fresh figs truly make the best ice-cream & it's really, really simple to make.
Being such a fragile fruit they often go off quicker than we can use them or they ripen all in a rush.
So...firstly- they freeze really well & can be slow baked any time of the year from frozen.
Secondly, the fresh fruit slow bakes so beautifully- just uses as is or...best of all, turn those succulent baked figs in to the most delicious ice-cream you've ever tasted.

So many different varieties & colours in the fig world.
They can be simmered in a pot..
you can find the recipe for simmered figs just here.
Or, you can spread them in a baking dish & bake them for an hour- an hour & a half on 120-130 C until they look much like this...


Each time I bake figs they come out a little different but always so delicious.
So here's the basic recipe for the ice-cream:
Slow bake as many figs as you have to work with.
Cool- blend with a hand mixer or in a small processor, bullet etc until fairly smooth.
The balance is 1/2 & 1/2 to get the texture of the ice-cream just right.
1 cup of baked fig pulp to 1 c of whipped cream
To the cream add 1 tsp of vanilla essence & either honey or maple syrup to taste.
To a 2 cup ice-cream I would probably add a tbsp of honey/maple syrup.
But taste it & see what you think.
No, no don't eat it all- it needs to go in the freezer first!
Ginger is a nice edition on occasion.
Freeze in a flatfish dish with a lid.
Serves perfectly, straight from the freezer & really doesn't require much else.
Just that simple.
Love Katie x
Related Posts with Thumbnails